A sincere thank you to all of you who take the time to leave a comment. I read and appreciate each one.
Showing posts with label DIY. Show all posts

Friday, September 28, 2018

Building a Garden Lighthouse

     After seeing so many cute ideas on Pinterest, last year I decided to build a lighthouse for our backyard. I bought 4 different size clay pots and one large saucer for the base and a small saucer for the top. After gluing everything together I spray painted the base and the small saucer black.


Then I spray painted the rest white.

I continued using painters tape and newspaper to protect the white and painted the raised edges red.


I then started the process of decorating it to look like a lighthouse.


Once that was done we moved it outside and I added some more embellishments.


Then I thought maybe I need just a little bit more. So I added a ladder, more water and a boat.


For the winter I put the figures away in the shed and covered the lighthouse with a plastic bag. WRONG. This is what I found when I uncovered it this spring.


Needless to say I was not happy. So I repaired everything and I sprayed it with Thompson water seal. I'm hoping that will help to protect it a little more. Also this year I will put the whole thing in the shed for the winter.


With the solar light on top the lighthouse does make a fun addition to our yard.


A thought to ponder: "If life were predictable it would cease to be life, and be                                       without flavor."                            Eleanor Roosevelt


Participating in: Grand Social, Share Your Cup

Monday, August 8, 2016

The Project that got away from me

     Have you ever decided to do something you thought would only take a little bit of time and it turned into something bigger? Well that happened to me this summer. I decided I needed to redo our fairy garden. I did a post in October 2014 about it, see: A Dance With Fairies. The problem with the location was the fact it was under a tree. The squirrels kept running through and knocking things over. I thought it would be better if we got it up off the ground. And so the project began. It started with my husband building a frame for a platform to place the fairy houses, etc on. In the notched out areas he placed wood slats.


    So now how do we get it up off the ground? We still had some concrete blocks from when we did the mound (see previous post). But who wants dull ole grey. I know let's paint them.

Before

During (enlisting the help of the grandson)

After

     Here's the finished platform. Over the wood slats we placed wire and then some indoor/outdoor grass carpet. Now I had a larger area then before so of course you need to make more houses to fill up the space.

I bought this little gazebo at Ben Franklin store. I painted it green and glued on the pine cone seed scales, then sprayed with clear coat. The little hanging baskets are made from tooth picks. The table and chairs I made from popsicle sticks and colored floral wire I found at the dollar store. I also made the weather vane on top from the same wire. Below you'll also see some bicycles I made from wire and buttons.

What better use for an old leather boot then to make a house for the Old Lady with so many children she didn't know what to do.

My grandson wanted a castle. I found this one at Michael's. I sprayed it with off white textured paint, then hand painted the rest. I made the draw bridge from popscile sticks and some chain from my jewelry making stash.

After we got everything set up I realized the area was getting too hot from the sun. So of course we made a sun shade. We also have a tarp nearby in case of rain. A fairy land wouldn't be complete without fairy lights. I found some solar string lights on line. We stapled them around the outside edge. Now it looks just as lovely at night as it does during the day.


Our local nursery sells fun things for fairy gardens. When our granddaughter was here for a visit we had to go and pick out a few more things. She and the grandson had fun arranging things. Everything got moved numerous times. Since Rex got his name on the castle she got to pick a house. This was her choice.


     This project started around the first part of April. I think we might finally be done. Or at least until I think of something else.


A thought to ponder: "Your mind is the garden, your thoughts are the seeds, the harvest can either be flowers or weeds."                          William Wordsworth


Tuesday, February 17, 2015

Garden Therapy: DIY projects

     I'm sure I'm not alone in starting to think about spring. Our snow had melted leaving the brown grass and bare trees staring back at me. But it didn't last for long and more snow came in the last couple days to cover the ground again. It will be a while yet before we'll be able to start planting anything. Maybe it's the same for you. So how about a couple DIY projects for the garden that you can do inside.


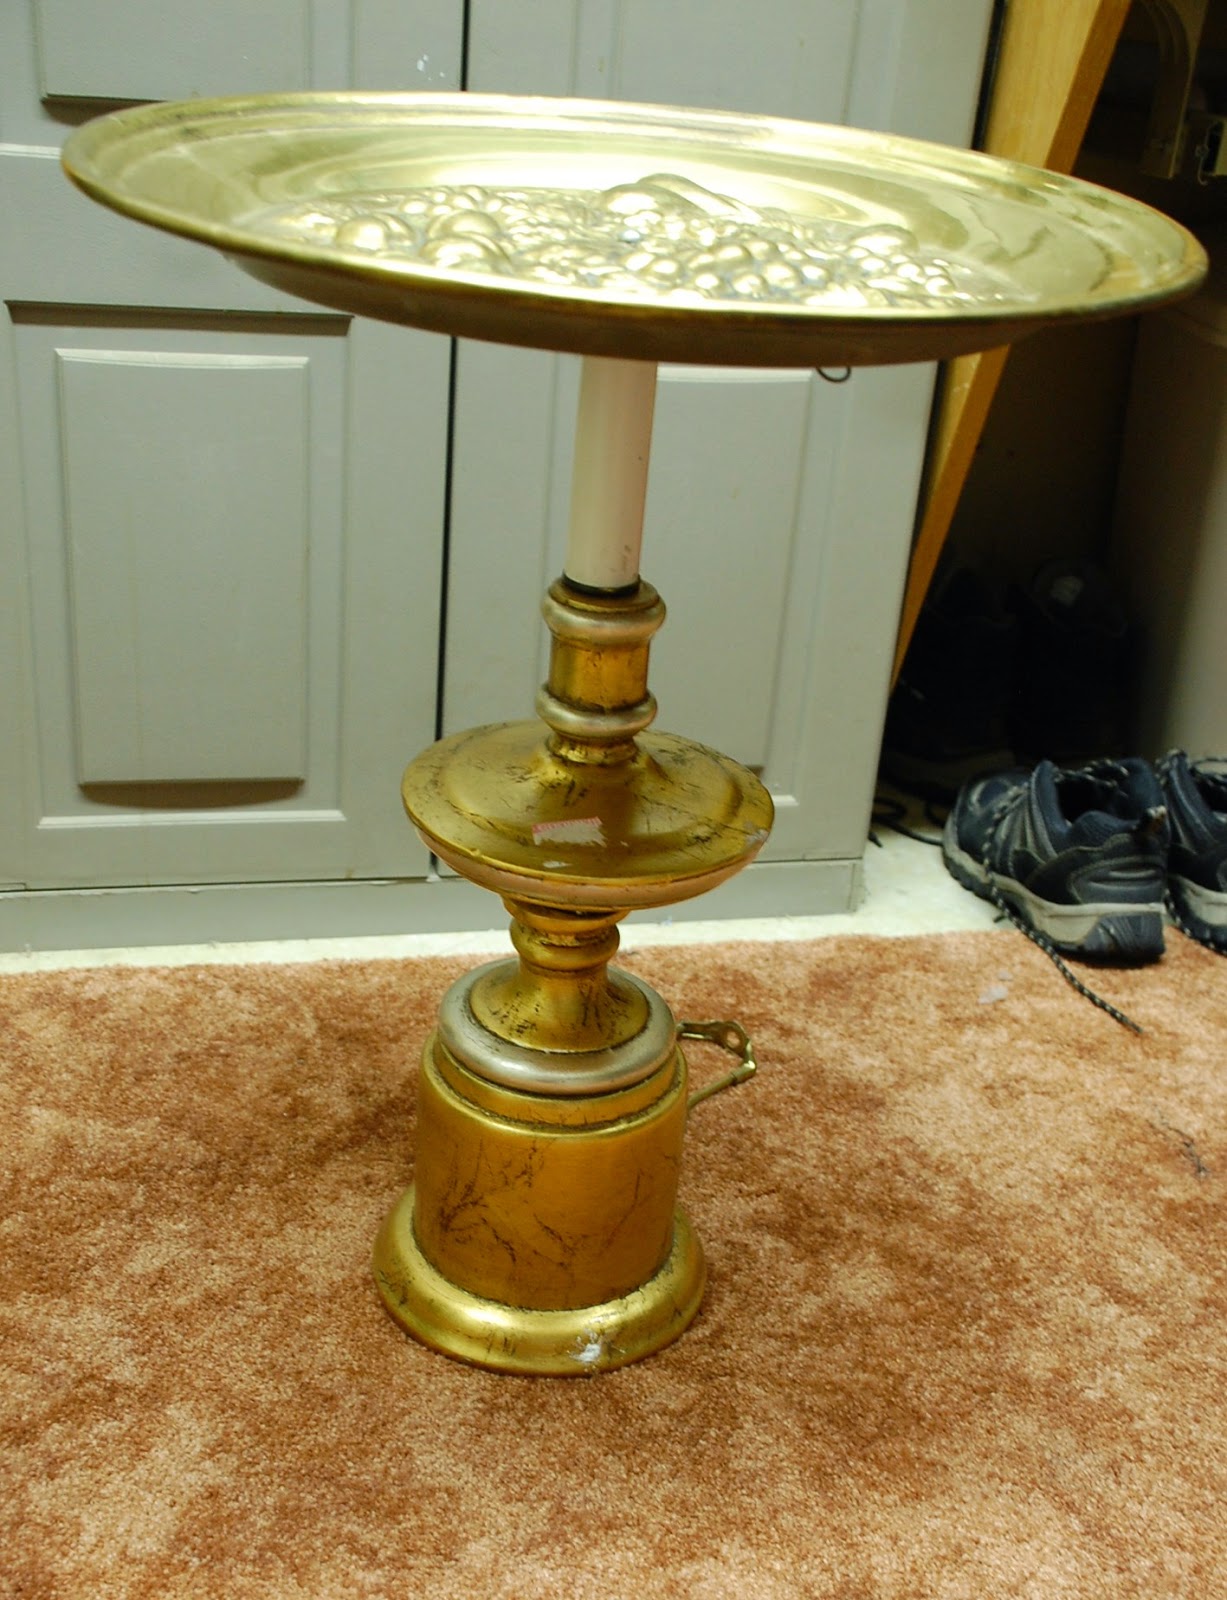
     I made the above birdbath a couple years ago for about $15. Can you guess what I used? A trip to the Goodwill store and I found a lamp and brass ornamental tray. By the way the lamp came with a shade, which I didn't need, so I just donated it back to them. Here's some before pictures.


     My husband removed the harp, socket and wires from the lamp. He then bolted the tray to the top using a little caulking to prevent leaking. I roughed up the surface with some sand paper then sprayed with primer. I used a stone textured spray paint for the final coat. It is decorated with glass tiles I bought at a craft store. It makes a perfect shallow bath for small birds and butterflies. We do put it in the shed for the winter, they can get pretty harsh here.

Here's a closer view of the top

     Another fun thing I created was from things I already had. A number of years ago I bought two solar butterfly lights. At night the lights would rotate colors and shine through the plastic butterflies. Over time the sun faded the butterflies and they really weren't very pretty anymore. But the lights still worked and I hated to throw them away. So what to do?


     I took an old CD disc and spray painted the non shiny side black. On the other side I glued flat clear floral stones, which I bought at the dollar store. I was then able to put the rubber piece, that held the butterflies in place, through the hole of the disc and mount it on the light.

 This is what it looks like during the day. Not only do I get lovely changing lights at night but I also have sparkles and rainbows during the day. Two for one.

     Here's a look at it at dusk. It changes from red to green to blue and back.

     I hope I've inspired you to make something pretty for your garden. As I look out my window at the snow I know underneath are lovely plants just waiting their turn. 


A thought to ponder: Slow down and enjoy life. It's not only the scenery you miss by going too fast, you also miss the sense of where you are going and why.                              Eddie Cantor